Monday, December 21, 2015

Happy Winter Break!

Dear Teachers and Librarians,

There are only a few days left in 2015. This is a perfect time to reflect on everything you’ve done well this year. Think of the wonderful books you’ve shared, hugs you’ve given, and minds you’ve opened. Though we are overworked, underpaid, and sometimes underappreciated, we’re some of the luckiest people on the planet. Teachers and librarians get to change lives and witness tiny miracles on a daily basis. As you enter 2016, affirm that you are doing one of the toughest, most important jobs, and then revel in the fact that you can! May good things come to you and your students in the New Year. Check back soon for fresh ideas for your classroom. They’re coming!


Ann Marie and Erin


Thursday, December 10, 2015

Candy Cane Math

What’s on the minds of every elementary student this time of year? Santa, presents, and CANDY! Why not give them what they want with some Candy Cane Math?

Print out our measuring sheet (in color or black and white), purchase miniature candy canes, and have a great time!

Thursday, November 19, 2015

Rectangle Riddles

During a unit on animals, we asked our students to write riddles. We thought this would be a unique and fun way to test their comprehension and application of the subject matter.

We wanted the students to be able to ask their riddles, but needed a way to hide the answers from students next to the reader, so we created Rectangle Riddles.


Take a piece of 8 1/2 by 11 paper and fold it in half. Voila! There’s your rectangle.

Students write their riddles on the front of the rectangle. The riddle should give three hints about the subject matter or content. Sometimes we give students criteria for their hints, other times we let them come up with whatever clues they like. For the picture above the criteria for the hints was to include the animal’s body covering, how the animal moves and a body part that is important for the animal. Students always end with a question such as, “Who/What/Where am I?”

The answer goes on the inside of the folded rectangle. Ask the riddle, and then lift the flap for the answer. It’s that easy. We required one riddle per student but the class loved the activity so much that most went on to write three or four.

Rectangle Riddles are appropriate for all core subjects and are a great interactive hallway display. Try them out and see how creative your students can get!

Wednesday, November 18, 2015

iPad Memories: A Digital Storage Solution

My current and former students and their parents are always giving me sweet letters and cards. I usually save them for a while but then need to throw them out when the collection becomes too large. Then I feel terrible that I’ve thrown out their special gifts. So I started taking pictures of them with my iPad. Now I can tap on my photo album marked “Student Letters” and read them anytime I want.

This also works great for classroom projects that I would like to keep a sample of to remember but just don’t have the storage. My iPad is currently storing pictures of our last bulletin board, our pet rocks and all of our monthly hallway displays. The students love to reminisce when I swipe through our pictures for the whole class to see.

Tuesday, November 17, 2015

Ideas Sweet Shoppe

Looking for a way to sweeten your writing center? Group empty cookie jars, candy jars, jelly jars or frosting canisters on a table or shelf to look like an old-fashioned candy store. Decorate with paint, permanent markers or ribbons to add a pop of color or designs. Attach labels to the front of each container to show writing topics for various subject areas. Some examples might be Math Munchies, Science Sweets or Language Arts Lollies.

Each container can hold story starters, thought provoking questions, task cards, or creative project ideas from the various topics. The prompts can be made on colorful cards or even wrapped and rolled to look like pieces of candy (for you super creative people)! Responses can be put in journals or on writing paper.

Take time to share the writing after it’s finished and make sure to keep your candy store fully stocked. It might even be fun to pass out a candy treat once in a while.

The Idea Sweet Shoppe is a great place for your early finishers to visit! You can snag your own copy of the sign here.

Tuesday, October 20, 2015

Desk Messages: An Easy Way to Make Meaningful Connections

Once the year starts and you’ve gotten to know your students better, it’s time to try out our Desk Messages. After only a week of school, we begin to see the unique personalities of our students and the ways they deal with everyday challenges and achievements. We like to honor their differences, offer encouragement and recognize their growth with a variety of messages.
We have 2 versions: tent messages and flat messages. Some students love having them visible for everyone to see. Other students like a more private approach and will even keep a flat card in their crayon box or notebook. Sometimes, we’ll even personalize the card on the back.

These desk messages can be for every day use or just for special occasions. The students look forward to the cards and most save them and look at them over and over. This is an easy way to “Catch ‘em Being Good” or to let your students know you are aware of their struggles and successes even if you haven’t had a chance to have a conversation with them.

Sunday, October 18, 2015

Book Bite # 5- Leo: A Ghost Story

October is one of our favorite months to be teachers! The seasonal changes, the Halloween excitement that spills over into everything students do, and the spooky stories. Oh, how we love the spooky stories! For extra ambiance, we’ll read them after turning off our lights and reading by the dim light of a glow stick or the flicker of an artificial candle. This year we’ve added a few new ones to our collections, including Leo: A Ghost Story by Mac Barnett, illustrated by Christian Robinson. You can also find Mac on Twitter!
While this story is ghostly, it is not one that would actually frighten any of our first graders. It’s a heart-warming story about finding friends who are just right for you. This Book Bite includes not only some fun follow-up activities we’ve created, but also some tasty treats! 

Friday, October 16, 2015

Monster Border

If you’re like me, you hoard border. You try not to and you clear out every few years, but your collection seems to grow on its own! A few years ago I bought some adorable "Furry Friends" monster border.  (How could I possibly resist these guys?)
I loved it… and then I stored it. And tucked away is where it stayed for longer than I’d like to admit. Then, last year, while I was looking for a Halloween craftivity for my class I uncovered my monsters and inspiration hit! I cut apart the border to show individual monster faces and gave each student his own monster. Then students glued the faces to the top of a blank paper and drew what they imagined the rest of the monster looked like. They did a great job and had a blast! You could do this with all kinds of borders.
What do you do with your extra border?

Saturday, October 10, 2015

Eat Your Homework with Ann McCallum

Learning is not always a piece of cake—or is it? Connecting healthy food with delicious discovery is a sure-fire recipe for success. Author Ann McCallum shares some thoughts behind her latest book in the Eat Your Homework series.

What are the Eat Your Homework books? 
There are three books in the series by Charlesbridge Publishing:
Eat Your Math Homework: Recipes for Hungry Minds
Eat Your Science Homework: Recipes for Inquiring Minds
Eat Your U.S. History Homework: Recipes for Revolutionary Minds (Release date October 13, 2015)


What are the books about?
Each illustrated book has six sections. Each section includes an interesting snippet about the topic, an original recipe, and some sort of ‘appeteaser’ or sidebar for kids to have fun with. The latest book, for example, includes recipes from when the pilgrims first arrived in America, to right after the Revolutionary War. Some of the recipes include: Thanksgiving Succotash, Southern Plantation Hoe Cakes, and Independence Ice-Cream. In the math book there are recipes such as Fraction Chips and Fibonacci Snack Sticks, and the science book includes Atomic Popcorn Balls and Density Dressing. The illustrator, Leeza Hernandez, created fab pictures to complement the text and recipes. Here’s one of my favorites to illustrate that the two Georges (George Washington and King George III) didn’t agree about what to do about the American colonies.

What inspired you to write these books?
I started with the math book. I used to teach fourth and fifth grade math and was looking for ways to get kids to love math. I gave my students a food project one day: mathematical gingerbread houses. Each student had to create a gingerbread house using graham crackers and then explain how they were mathematical. The students really got into it; they measured area and perimeter, they created geometric shapes, and they calculated to get products and sums of the decorative candy. I started experimenting with my own math recipes after that. Eventually, I wrote Eat Your Math Homework. I got really excited about the connection between learning and food. Creating recipes to learn about math, science, or history is such a fun, hands-on way to get kids engaged.

How about you? Where did you grow up?
I was born in Calgary, Alberta, Canada. My family moved to British Columbia, the furthest west province in Canada, when I was going into sixth grade. My new home—just outside a town of 1500 people—was completely different from the city I’d grown up in. I loved it. My dad built our house from logs. It was in front of a huge lake with a series of mountains on the other side. It was wild and beautiful, and I spent my childhood exploring the woods near our house. I especially loved the abandoned cherry tree orchard and spent many hours perched in a tree, munching on cherries and reading books.

How did you come up with each of the recipes?
It was actually loads of fun to experiment in the kitchen for each of the recipes. I thought about how I could connect the topic to some kind of food and then I started experimenting. For example, in the science book, I loved the idea of creating a recipe with invisible ink. I remembered when my brothers and I used to use lemon juice to write messages in ‘invisible ink’ on paper. I figured if it worked on paper, there had to be a way to make it work on pizza dough. I tried many times before coming up with Invisible Ink Snack Pockets.

What’s your favorite recipe in the books?
Well, the Invisible Ink Snack Pockets are really good, but I also love the Revolutionary Honey Jumble Cookies. They’re a yummy afternoon treat if you’re in the mood to think about the American Revolution! Or, there are the Tessellating Brownies, too…

What’s your favorite food in general?
I love all kinds of food-- salads, raspberries, cheese, fajitas. I don’t like things that are too spicy, though.

THIS OR THAT: 
1. Chocolate or vanilla? really good vanilla
2. Black or blue ink? No druthers (but I do like green and pink ink)
3. Football or baseball? Baseball all the way!
4. Dogs or rabbits? Rabbits
5. Monkey bars or swings? Swings


Thanks for sharing with us Ann! You can read more about her books on her website. She even has a section specifically for parents and educators!

Sunday, October 4, 2015

Do-Over Dots

When students make careless mistakes on their math papers, sometimes I ask them to rework the problem. Many times they don’t erase well enough for me to decipher the new answer or they complain about having to erase. I use dot stickers (found in office supply stores or local chains like Wal-Mart or Target) to cover up the wrong answers. When the papers are handed back, the students automatically see which problems need to be redone. This also serves as a quick visual indicator to help parents identify possible problem areas for their child.


An Ed Emberley Art Center

Who doesn’t love Ed Emberley books? I used them when I was a little girl and now I use them in my classroom. They build artistic confidence and spread creativity. My favorites have always been the thumbprint books. You start with a basic thumbprint and turn it into something fun like an elephant or spider or lion. If you have a whole page of thumbprints you could make your own zoo!

Erin and I like to make copies of our thumbprint page.

Then we set up an art center for our students. We include Ed Emberley’s books, markers, colored pencils, crayons and clipboards. We display a sample page too.
Sometimes the students copy our ideas, other times they create their own, like a thumbprint Elvis! This is a quick and easy way to encourage students to draw using basic shapes, lines and squiggles.

Wednesday, September 30, 2015

Magic Spelling Wands

Looking for a fun way to practice spelling words? Have your students make their own magic spelling wand! Give each student a small dowel rod (or wooden skewer with the pointy end clipped off), a star made from cardstock, an index card or thick scrapbook paper, and some ribbon or string. Instruct students to tape the star onto one end of their wand. (You can also hot glue these on in advance for a longer lasting wand.) Then have students pick out some ribbon or yarn to add to the back of the star.
When your wands are finished, use them to write your spelling words in the air. I’ve had students spell the words aloud as they write them and then make a magical twinkling sound as they circle or underline their finished words.

You can use these wands as part of your spelling center, a way to liven up your routine during a spelling slump, or to keep your students spellbound at the end of the year.


Happy Spelling!

Friday, September 18, 2015

Mrs. Killion’s Turtles

I have an amazing volunteer named Mrs. Killion. She is constantly thinking of fun projects for my students to do and she returns year after year to help me. Do you remember her popcorn ball spider eggs? This is another one of her creations.

A friend of hers had a ton of baby food containers she was keeping in case she ever needed them. (Sounds like teacher hoarding to me!) When she realized she would never use them, she gave them to Mrs. Killion who turned them into these adorable turtles.
She uses this pattern and copies it on green construction paper, 2 patterns per turtle. As the pattern indicates, she includes pieces of pipe cleaner. When the two patterns are glued together, the pipe cleaners add flexability to the legs and head of the turtle. (How brilliant is that? You could use that trick on so many projects!) Finish off with a pink tongue and wiggly eyes. Then glue the pattern to the plastic lid.

Sometimes we fill the containers with goldfish crackers for a fun snack. Other times we take it one step further and turn it into spelling practice. The students write their spelling words on dot stickers and add the stickers to the “shell” of the turtle. They can keep their new pet on their desk and refer to it all week to review spelling words. You could also practice addition or subtraction facts on the stickers. My students love taking the turtles home and refilling them with other treats, so don’t be surprised if they show up again during snack time!

Wednesday, September 9, 2015

Easy Writing Pages

A few years our school adopted a new instructional framework that focuses on higher order thinking and writing. Our students have really latched onto this program and are writing more than we’ve ever had them write before.

When some of the assignments got home, they would be slightly difficult to make sense of without the writing prompt, so we had to figure out a way to include it on every student’s paper. At first we tried writing the prompt onto the top of the page but it looked too messy. Then we tried printing directly onto the writing paper so that it would be centered and neat. But a problem arose when my printer broke and was not replaced since we’re going towards centralized printing (yaaaaaaay). When I wanted to print onto the paper I’d have to go into another teacher’s classroom to use her printer or attempt to use the copier to get it onto the writing paper. This usually took 2 or 3 tries after first printing on the back, and then upside down. Cue frustrated sigh.

The problems continued when we realized that, as a grade level, we were going through ream after ream of writing pages and getting close to the end of our supply. So we came up with this idea! We can make our own writing pages that we can type onto and print. We can get the prompt at the top of the page and decide if we want a picture space or no picture space, landscape or portrait, large writing lines or small. What a time saver!!
Here are the writing pages we currently use. We’ve uploaded landscape and portrait formats both with and without picture spaces. These have made our lives much easier and students are really motivated to move on to a page 2, 5, or higher! For easy storage, get some nesting paper trays and store each page number in it’s own bin. Stack them when they aren’t in use, spread them out on a table or the floor when they are. Happy Writing!

Monday, September 7, 2015

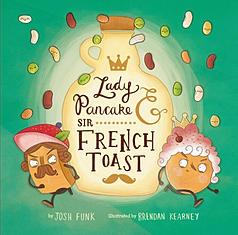
Book Bite #4- Lady Pancake & Sir French Toast

Since our Book Bites for Lion vs. Rabbit, Unicorn Thinks He’s Pretty Great and Sam and Dave Dig a Hole have been so popular, we thought we’d share some of the activities we’ve done for one of our new favorites- Lady Pancake & Sir French Toast written by Josh Funk and illustrated by Brendan Kearney.

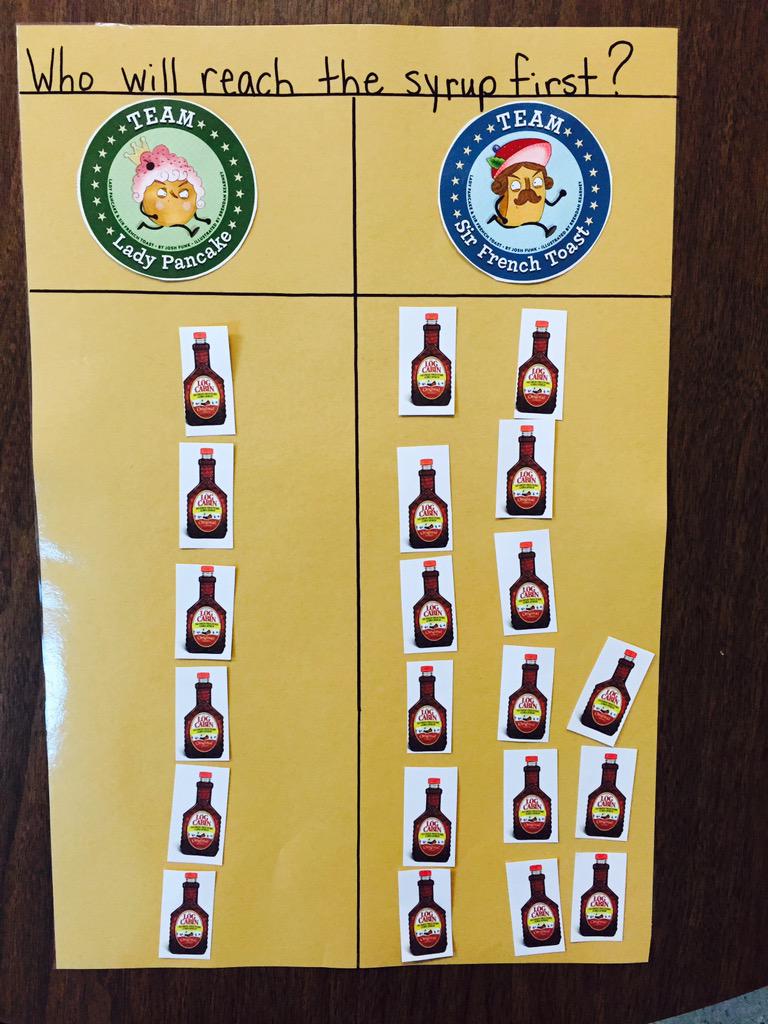
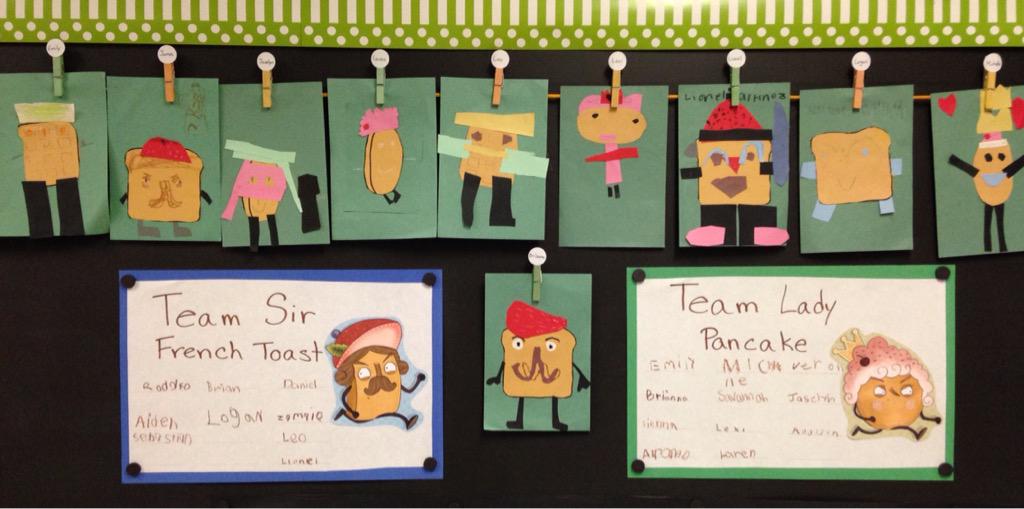
You had us at the title, Josh, but then we saw the amazing book trailer. A pancake and French toast battling it out for syrup? Who doesn’t love a little competition? This book proved to be perfect for the beginning of school as we could easily relate it to our citizenship unit. Snag our Book Bite here.
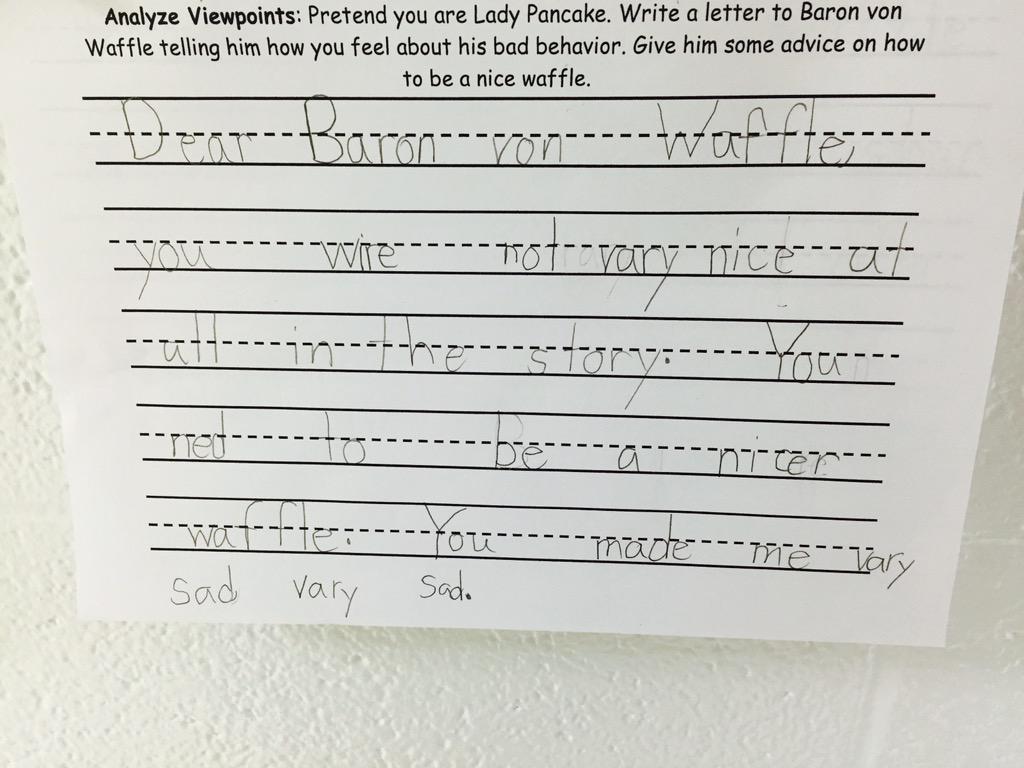
Check out some of the activities we’ve already done!


Thursday, August 27, 2015

Adorable Apple Craft

This adorable project comes courtesy of our colleague Diane Ramsey. She created this craft to hang on her classroom clothesline. It’s super easy and provides an opportunity for your students to show their personalities through art.

First, give everyone a basic apple pattern and a half sheet of paper. You can vary these colors depending on the color of your apples. We provide green, red and yellow apples and allow our students to choose which color they’d like. Next, pass out white dot stickers for the eyes. Then, make sure you give access to paper scraps, glue sticks, crayons and scissors. Our students cut their own leaves, stems, grass and other props. In the past, students have made apples holding books, wearing glasses, talking to worms, wearing high-heeled shoes and other silly things.
When finished, make sure to allow time to share. There will be lots of laughs to go around.

Thursday, August 13, 2015

Pete the Pasting Pirate: A Glue Stick Lesson

Every year, when we glue something into our journals for the first time, I like to watch how the students use their glue sticks. Over the years I’ve noticed the same mistakes over and over. I’ve grouped these classic blunders into 3 categories; I’m sure you’ll recognize them.

1. The Single Dot: One dot, big or little, in the middle of the paper. Nothing else. Never sticks.
 2. The Power Pusher: Half of the glue stick ends up on this page. It’s lumpy, it’s bumpy, but it will never fall off. Ever!
3. Full Coverage: Every single spot on that paper has glue on it. The student will be asking for a new glue stick by the end of the day.
You’ve seen them all before, haven’t you? But how do you get them to stop?! Enter Pete the Pasting Pirate. This short tale will have students gluing their papers like pros in no time.

Long ago, there lived a pirate named Pam. She was fierce, she was strong but she was always losing her treasures. If she could figure out a way to stop losing them, she would be so much happier! On one of her journeys across the sea, she met another ship captained by Pete the Pasting Pirate. Pete shared his secret for getting treasure to stick around. When you bury your treasure in the right place you will never lose it! “But how do you find the right place?” wondered Pam.

“If you land on a small island,” explained Pete, “you can leave after you make your mark. This is no place for treasure.”
“If you land on a larger island,” continued Pete, “send out a man to walk the edges of the island. If you discover it’s not big enough, sail on. This is still no place for treasure.”
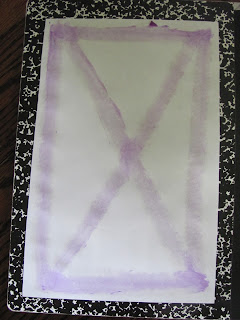
“But if the man walks the edges of the island and discovers it to be quite large,” finished Pete, “then bury your treasure and mark it with an X. You’ll never lose your treasure again!”
“And remember, matey, never press too hard to make your X."

While you tell the story, be sure to model the three types of gluing on different sizes of paper. I hope Pete can help you alleviate some glue stick problems in your classroom!

If you like this story, you can download a mini-poster here.

Monday, August 3, 2015

Everything Journal

Our school used to order planners for each of our students. But what we discovered was that they weren’t really being used like they should have been. So we turned them into “Everything Journals”. By the end of the year each journal was filled with colorful and imaginative responses.

We no longer order planners, so we’ve turned our planner prompts into journal prompts! The prompts can be used in pre-K through third grade classes. Emergent writers can use a mix of illustrations and words or short phrases to respond to the prompts. More fluent writers can respond using sentences or paragraphs. This makes differentiation a snap.


The prompts can be used weekly, or cut apart ahead of time and placed at a writing or literacy center. We have made both color and black and white options that you can choose from depending on your printers and copiers.

The prompts are so varied that our students never tire of doing them.

Thursday, July 30, 2015

Caterina and the Lemonade Stand

Looking for something to do with your kids this summer? Why not make a lemonade stand? We have the perfect book to introduce the idea: Caterina and the Lemonade Stand, by Erin Eitter Kono.
Take a break from the heat and check out this book from your local library or even buy your own copy. You’ll love it.

Wednesday, July 22, 2015

Invisible Dog: The Easiest Classroom Pet

I have had fish, hermit crabs and a turtle. Many other teachers have gerbils, mice, snakes, hamsters etc… I have found real creatures can be REAL maintenance. And what do you do with them over the long breaks? How about the unexpected snowstorms? Not to mention, schools are revisiting health and safety policies that won’t allow certain animals in schools anymore.

So one year I got an invisible dog and allowed the kids to name him. He had a visible bed, toys, food and water dishes. He was well behaved and never had accidents. My first graders adored him. They took him to recess and even on errands to the office. I put books about dogs (both fiction and nonfiction) by his bed, in case students wanted to brush up on their canine knowledge or read him. 
You could also let your students take the dog home over the weekend with a dog journal. Each family could experience the joy and ease of having an imaginary pet.

Thursday, July 16, 2015

Mystery Book

Looking for a way to spice up your read aloud routine? Try this!
Wrap a book cover or folder around a book you think your students have never seen. After telling them the title, ask students to guess what the book will be about. Make a list of their ideas. Next, read the book without showing the pictures. When finished, ask students to draw a scene or character from the book. Obviously, they will be drawing what they think the scene or character looks like. Share their creations and then unveil the cover. Reread the book, this time showing the pictures. Your students will be entertained and amused by their own creations and the contrast to the actual pictures. Tweet or Instagram the alternate illustrations to the author and illustrator of the books you use throughout the year.

Monday, July 13, 2015

Pencilpillar

Tired of students losing their pencils? This is a surefire way to change that.
Gather wooden clothespins and medium sized pompom balls. On each clothespin, glue three pompom balls in a line to resemble a caterpillar. You can use multiple colors or matching colors. Glue wiggly eyes on the pompom closest to the end that opens up (opposite the end where you squeeze). After the caterpillar dries, show students how to clamp their pencil in the clothespin. When they aren’t using their pencils, the “Pencilpillars” will stay on their desktops and watch over their pencils so they won’t get lost. I like to start the first day of school with these fluffy fun surprises.

Monday, June 29, 2015

A Drink, A Dessert, An Idea

This year was like a roller coaster ride, speeding by, taking us through loops, making us scream, and ending with a sudden stop. It’s that sudden stop that always gets us. It’s hard to smile and wave good-bye to kids who are crying and turning around for one last look at you before they go. Sniff, sniff.

Don’t get me wrong, we like the two month break from new mandates, curriculum map changes, grading papers and TESTING, TESTING, TESTING. I especially look forward to going to the bathroom whenever I want.

But for these same two months we do miss our teaching lives. Who doesn’t love reading books to a captive audience of 21? Where else does this same group cheer when you come back from a 30 minute meeting down the hall? Not to mention my colleagues (Teacher BFFs?) are no longer within walking distance to where I am. Am I already having withdrawal?

Though we haven’t started brainstorming for next year yet, we know it will happen soon. So we want to share a few ideas to help you regroup and relax... for now.

Here’s a book that will give you great ideas and maybe even a creative outlet! 59 Reasons to Write: Mini-lessons, Prompts and Inspiration for Teachers by Kate Messner.
Check out this drink,
Eat, drink and be lazy! It’s your two months to do whatever you want. Savor every minute. Before you know it you’ll be locked back in your seat, bar across your lap, taking off for another thrilling ride.

Ann Marie